Whiteboard explainer videos use illustrations, animation, and voiceover narration to convey complex and abstract ideas in an entertaining and engaging way. In a world of smartphones and social media, attention is the new “currency”, and explainer videos are a great way to stand out and hold a viewers attention long enough to unpack the details of your product or service.
I love creating explainer videos because they combine a number of disciplines that I enjoy, including script writing, storyboarding, drawing, and video production. All of my explainer videos use hand-drawn illustrations instead of “library” or pre-drawn images. I feel that custom, bespoke illustrations are more effective because it allows you to create visuals that best compliment the narration and craft a cohesive look rather than searching for ones that are merely “close enough”.
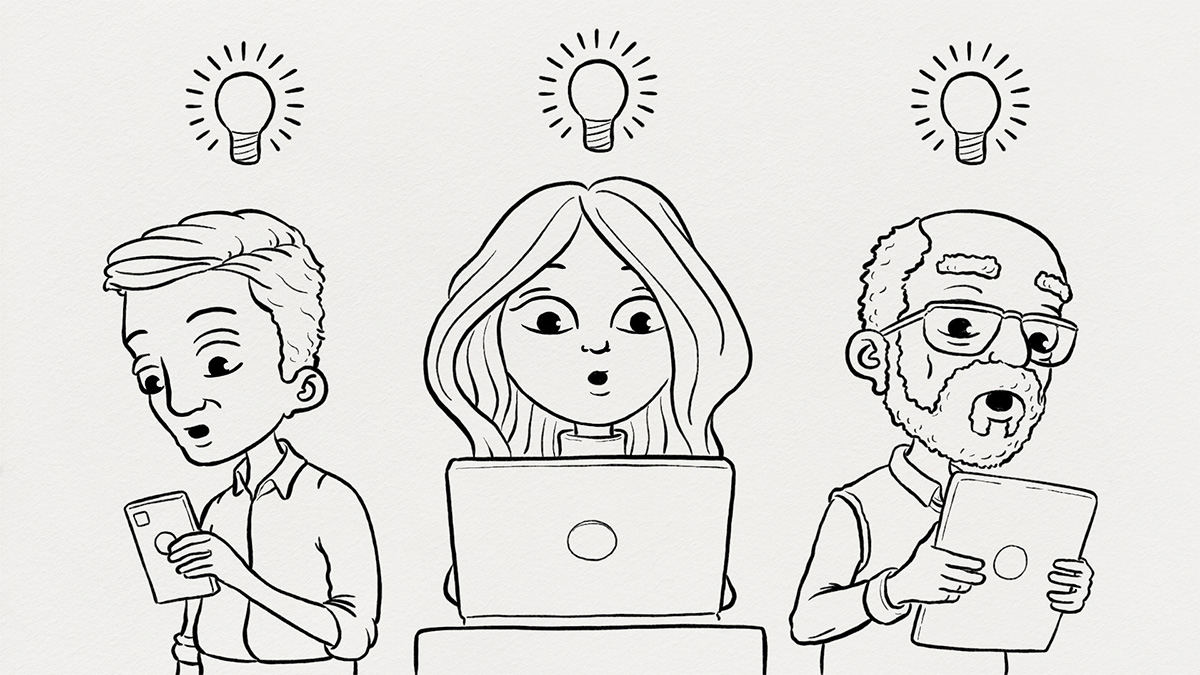
What Do My Whiteboard Explainer Videos Look Like?
The term “whiteboard explainer video” can leave a lot to the imagination because styles can vary so much, so I decided to create a whiteboard explainer video ABOUT my whiteboard explainer videos. This will give you a feel for how I approach creating my videos AND show you my style in a finished video.
CLIENT EXAMPLE
Explaining the California Cannabis Industry
I was contacted by a cannabis grower from ExpendaFarms (expendafarms.com) who was putting together a documentary on the current state of the California cannabis industry. He wanted me to create a short explainer video that outlines the tension between larger corporate growers who are motivated primarily by profit and the smaller legacy farmers who represent the larger cannabis culture.
The individual gave me some background on the cannabis industry in California, which I used to help shape the explainer video script. He and his production team also provided me with the narration and background music, which I combined with the visuals I created to make the final 4K explainer video.
CLIENT EXAMPLE
Income Annuities
Here is a series of whiteboard explainer videos I completed for an investment company on the topic of annuities. The agency I worked with provided the scripts and “visual cues/suggestions” to start with for each video. From there we collaborated on changes and settled on final scripts and storyboards. They arranged the background music and the voice artists. I combined all of this with custom illustrations to create each of the final explainer videos shown here.
My Process
Because explainer videos can be complex and labor-intensive, I’m a big believer in working through a process when creating them. Each step builds on the previous one, and so the further along you get the harder (and more expensive) it is to incorporate changes. At the same time, there is a certain amount of “art” to this, so there needs to be flexibility. A process provides a framework to ensure that things move along as efficiently as possible for everyone, while at the same time allowing for adjustments and modifications along the way as is often the case with creative work. Here is the process I normally follow when creating an explainer video (which is the same process I followed for my own explainer video above):
1. Script
With an explainer video, it all starts with a script. It is common to want to jump to the actual video and graphics, but if it is not based on an effective script the final video will be no better. (A “garbage in, garbage out” sort of thing.) In an ideal situation I am collaborating with the client on the script.
At this stage (and going into the “Ideation” stage next), I like to keep the idea of storytelling in the back of my mind. The script and the resulting video should not merely deliver information, but rather deliver the information wrapped in a story. Humans are naturally drawn to stories and they are an incredibly effective way to package a message. For example, if you boil your favorite book or movie down it is saying SOMETHING. That SOMETHING is the message, but it resonates with you as a human because of the surrounding STORY.
2. Ideation
Once the script is settled on, I start to create thumbnail sketches for ways to visually convey what is in the script. I’m looking for the important concepts and ideas that would benefit from complimentary illustrations or motion graphics of some kind.
To drill down on this a bit, I feel that explainer videos “work” because they leverage our collective visual shorthand to facilitate the understanding of more challenging topics.
Take financial concepts, for example. People in that industry will be accustomed to text-heavy information, charts and graphs, and specific jargon. People not in the industry may find this confusing or dry, and you will lose them. However, complementing the narration with some basic visuals can help:
- You can use money stacks to REPRESENT money.
- You can use the SIZE of money stacks to represent RELATIVE AMOUNTS of money, without necessarily needing to get into the exact quantities.
- You can use GROWING money stacks to show CHANGES in the amount of money.
- You can use MOVING money stacks to show TRANSFER of money.
- And you can use different DEPICTIONS of people to show WHO has that money.
This is just scratching the surface, but even these relatively simple visual techniques can help convey the essential information to wider audiences in ways that other methods don’t.
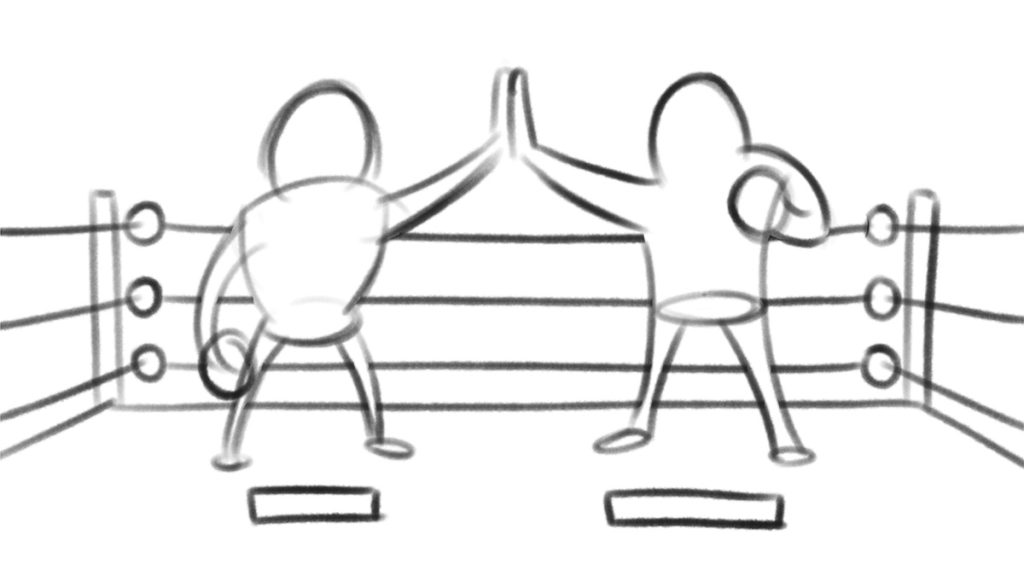
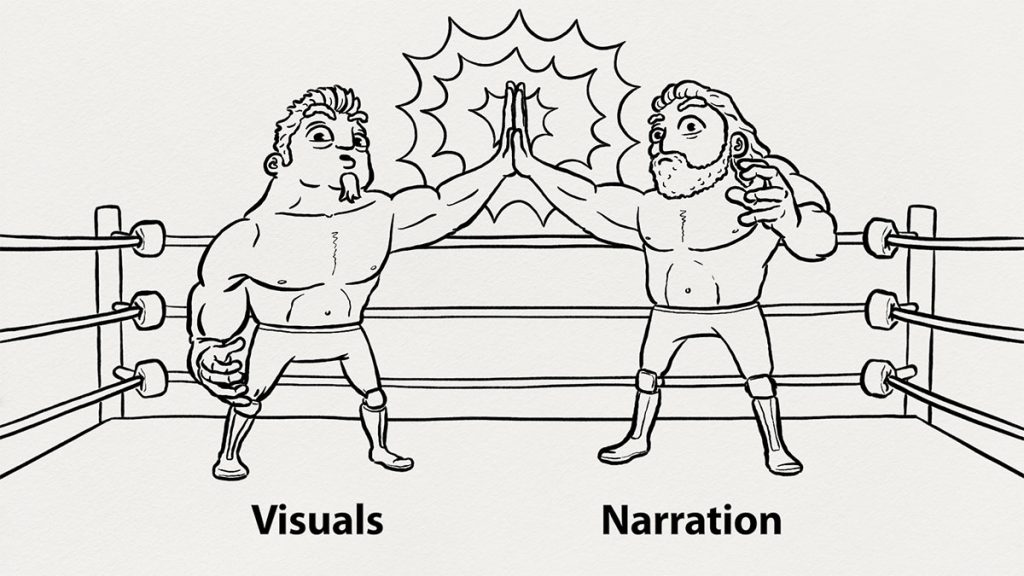
In an example from my own explainer video, I wanted to come up with a way to show “Visuals” and “Narration” working together. There are a lot of ways to convey partnership or collaboration, but I really wanted something a little different and with a touch of humor. I opted to represent each as a wrestler and the two high-fiving as members of a tag-team. The rough thumbnail sketch is shown below.
3. Storyboard
I then document all of this ideation into a storyboard document. This will show key visual moments in the video, along with the portion of the script they correspond with and any “stage direction” that I’m planning, like if things will move into frame or be animated at a certain time. I will share this final storyboard document with the client for approval.
These storyboard images also server as the basis for the illustrations in the final explainer video.
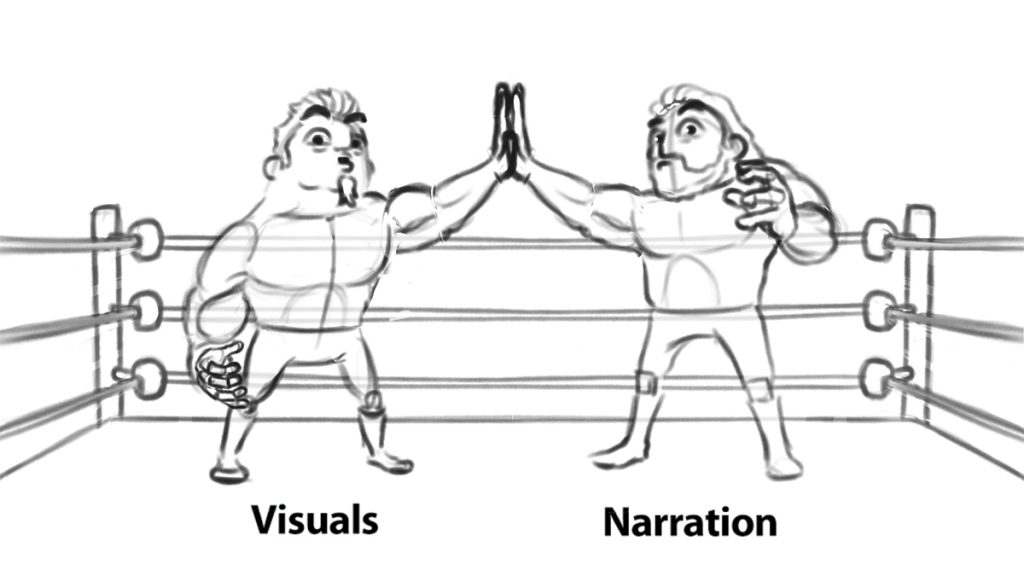
Again using an example from my own explainer video, I created a tighter version of the thumbnail sketch of the wrestlers that is suitable to show the client in a storyboard document. The storyboard drawing is shown below.

4. Explainer Video Production
With the storyboard document approved, I then move on to creating the actual explainer video. Lots of drawing!
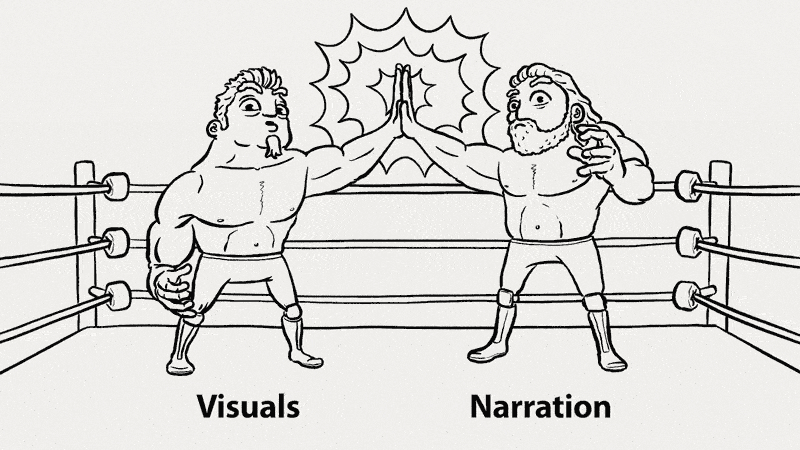
Continuing with the same example from my own explainer video, I used the storyboard drawing as a guide in creating the illustrated graphics for the explainer video. Below is an image from the final video.
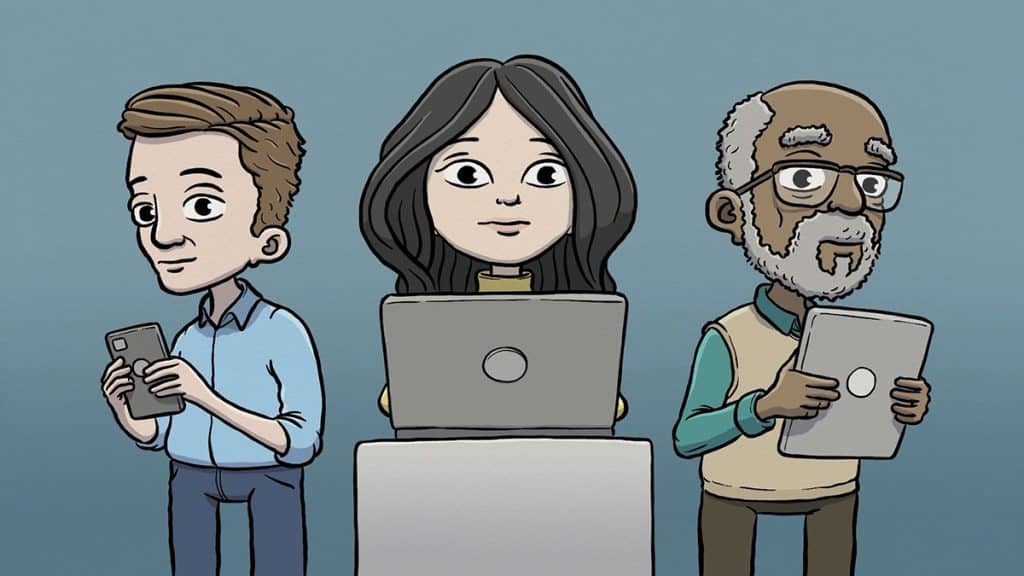
Black and White or Color
The explainer videos I create are typically black and white, but color is also an option!
5. Narration and Background Music
Arranging the voiceover artist and getting background music can often happen a the same time as the previous steps are happening. For the voice work, I have used online voice talent services and have also had the client provide this. If there will be background music in the video, I normally use royalty-free music that can be purchased online, but like with voice talent I have had the client provide this as well.
6. Explainer Video Finalization
After I assemble a cut of the video I will share it with the client to get feedback. From there I work with the client on any changes that may be needed until we settle on a final version.
When the explainer video is complete, I export a high-quality file and send to the client. I can also send along a few still images from the video for use as video thumbnails for YouTube or other social media sites.
If you’re interested in a whiteboard explainer video for your product or service, contact me and we can discuss further.